Appointment Check-In QR Code for Forms & Arrival Pages Today
Create appointment check-in QR codes for intake forms, arrival pages, booking links, consent forms, support pages, and updates. Use them on desks, doors, signs, and reminders today.
Free QR code generator
Create a QR code online
Generate QR codes for websites, email, phone numbers, vCards, Wi-Fi, plain text, forms, PDF files, and campaign links. Customize colors, add a logo or frame, then download a print-ready PNG or SVG.
Choose QR code type
Website QR code, Email QR code, Phone QR code, vCard QR code, Wi-Fi QR code, Text QR code, SMS, WhatsApp, event, and download links.
Add your content
Enter your website URL, contact details, message, phone number, location, or file destination before generating the QR code.
Customize and download
Adjust QR colors, error correction, logo, frame, size, and margin. Generate QR Code, Download PNG, Download SVG, or Save and track scans.
Arrival flow
Use appointment check-in QR codes when visitors need the right form or update
An appointment check-in QR code can point to an intake form, booking page, arrival form, consent form, support page, appointment update, queue instructions, preparation checklist, or payment link. It is useful for clinics, salons, repair shops, consultants, studios, service businesses, local offices, and appointment-based teams where people often arrive with the same first question: what should I do now?
QR Code Lab creates the QR code and sends visitors to the destination you choose. It does not manage appointments, process payments, validate IDs, run check-in systems, operate POS software, collect medical data, or store customer records. The QR destination should be the booking, intake, form, portal, or support system your business already uses.
The value is reducing front-desk friction without removing human help. A clear QR sign can move routine actions to the visitor’s phone: confirm arrival, fill intake details, update contact information, read preparation steps, or open a support page. Staff can then spend more time on exceptions, personal service, and questions that actually need a person.
Arrival workflow
Use appointment check-in QR codes to make arrival smoother
Check-inAn appointment check-in QR code should help patients, clients, students, members, or customers confirm arrival, submit the right form, and understand the next step before the front desk has to intervene.

Let people check in from the waiting area
Place the QR on appointment reminders, lobby signs, front desk cards, intake packets, or kiosk backup signs so people can start check-in while staff handle the room, service, or queue.
The scan should reduce waiting, not create another confusing form.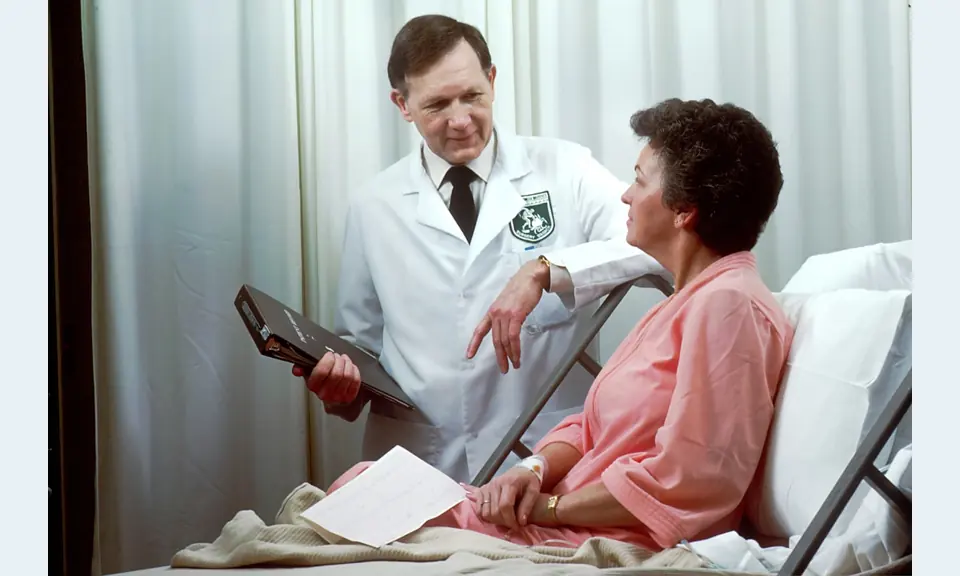
Match the form to the appointment type
A new patient intake, consultation arrival, salon booking, clinic visit, class session, repair appointment, or service check-in may need different fields and instructions.
Separate destinations prevent one generic form from becoming a front-desk cleanup problem.
Show what happens after submission
People should know whether to wait, approach the desk, show confirmation, upload documents, complete consent, or expect a message from staff.
A clear confirmation screen is part of the check-in experience.Check-in QR should move the person from arrival to readiness
The destination needs enough context to feel official and enough focus to finish quickly on a phone. Keep private records, payments, and sensitive intake steps inside the systems that are meant to handle them.
Use the QR to start the workflow; do not make it carry every operational boundary alone.Arrival
Confirm who is here, which appointment they came for, and whether staff should be notified.
Forms
Collect only the details needed before the visit, class, consultation, or service begins.
Queue
Explain whether the person should wait, go to the desk, show confirmation, or complete another step.
Updates
Use editable destinations when forms, policies, service types, or arrival instructions change.
Arrival UX
Make the appointment scan short enough for a waiting room
Scan UXAppointment check-in happens while people are arriving, holding paperwork, watching the queue, or preparing for a service. The page should be fast, clear, and specific to the appointment.
The page confirms the appointment context immediately
clinic, salon, class, consultation, repair desk, service counterThe first screen should name the organization, location, appointment type, or service path so the scanner knows the QR belongs to this visit.
Avoid sending arrivals to a broad homepage or a form that looks detached from the place where they are standing.
The check-in can finish without desk help
name, time, service, short intake, confirmationUse large buttons, short fields, and clear progress. People should not have to pinch zoom, search for the correct form, or re-enter information that the team does not need before the appointment.
If the flow branches by appointment type, make the choice obvious before asking detailed questions.
The scanner knows what to do after submitting
wait here, show screen, go to desk, upload document, staff notifiedA good confirmation screen reduces repeated questions. It should tell the person whether staff received the check-in and what happens next.
For healthcare, legal, finance, or other sensitive contexts, keep private data boundaries clear and send secure steps through the proper system.
Can it load on lobby Wi-Fi or mobile data?
A check-in QR fails operationally when the page is slow at the exact place people need it.
Does it ask only for pre-appointment details?
Avoid turning a simple arrival scan into a long intake workflow unless the visit truly requires it.
Is the staff fallback obvious?
Print what to do when someone cannot scan, has accessibility needs, or needs private help at the desk.
The best check-in QR shortens the line and preserves trust
Use it to make arrival smoother, while sensitive intake, payment, identity, and record systems keep their proper controls.
Waiting-room placement
Place appointment QR codes before the front-desk bottleneck
PlacementA check-in QR code should appear where people naturally pause: appointment reminders, lobby signs, intake packets, counter cards, or waiting-room tables before they need staff attention.
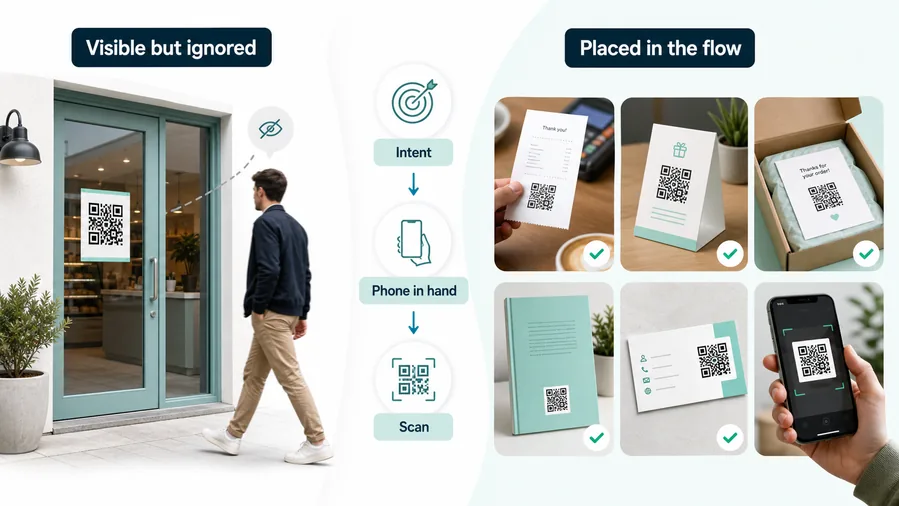
The QR appears only after the person reaches the desk
If the QR is hidden behind the counter or shown only after a staff member explains it, it does not reduce the line.
The best placement lets arrivals start while they are waiting, not after staff already stopped to help.
The scan starts the visit while the person is already waiting
Put the code on reminder messages, door signs, lobby posters, clipboard covers, counter cards, or seating-area signs with enough room to scan comfortably.
Use a clear CTA such as “Scan to check in for your appointment” and make sure the destination matches the exact location or service.
Can people scan without blocking the desk?
Place codes where arrivals can stand or sit while completing the form.
Does the CTA name the service?
Check-in for a clinic, salon, class, consultation, or repair visit should not look like a generic QR prompt.
Are private conversations protected?
Do not force sensitive answers on a public screen or crowded line when staff assistance is more appropriate.
Is there a non-scan path?
Keep a visible desk option for accessibility, device issues, language needs, or private questions.
Appointment reminder
Let people check in or prepare forms before arrival when the workflow supports it.
Lobby or waiting room sign
Best for arrivals who can scan while seated or standing away from the desk.
Front desk card
Useful as a backup when staff need to direct people quickly without repeating the full process.
Intake packet or clipboard
Connect paper forms, consent steps, upload instructions, or service-specific notes to the mobile check-in flow.
Poster or event sign
Best where people pause: registration line, booth, waiting area, seat back, schedule board, or exit path. Weak when people only pass at speed.
Business card
Useful after a conversation because the person already knows why they might save a contact, open a portfolio, book a call, or follow up.
Window sign
Good for after-hours menus, booking, pickup instructions, or quick offers. Avoid complex actions when the person is outside and just walking by.
Cover or front label
Use it only when the promise is immediate and clear. Otherwise the better scan moment is often inside the material or after the first interaction.
Good placement turns waiting time into useful preparation
Put the QR where arrivals can act before the bottleneck, then make the next step clear enough that staff interruptions actually decrease.
Arrival placement
Put the QR code where waiting already happens
Good placements include reception counters, waiting rooms, service desks, repair drop-off areas, salon stations, studio entrances, appointment cards, lobby signs, and printed reminders. The CTA should say exactly what the scan does: check in, complete intake, update appointment, read arrival steps, or upload details. A vague scan me sign is less helpful when people are already trying to follow a process.
Think about the visitor’s phone moment. If they are standing in line, make the page short and easy to use one-handed. If they are seated in a waiting room, a longer intake form may be fine. If the QR code opens a policy or consent page, make sure it is readable on mobile and does not require pinching or hunting for the next button.
Dynamic QR codes are useful because forms, hours, booking pages, policies, and support links change. Scan analytics can show whether visitors use the printed check-in route, but completed appointments, submitted forms, and customer records remain in your booking or form platform. That keeps the QR helpful without pretending to be the whole appointment system.
Privacy boundary
Keep appointment check-in QR codes within the right data boundary
TrustAppointment check-in can touch sensitive personal, medical, service, or payment context. The QR page should look official, collect only what is needed, and send protected steps through the correct system.

A generic form can collect the wrong information
Do not ask every scanner for the same long set of details. Match the check-in to the service, appointment type, or intake requirement.
Watch for similar-looking domains, long URLs, login or verify keywords, and pages asking for credentials after an unexpected scan.
Sensitive data may need a secure portal
Medical, legal, financial, identity, insurance, and payment details should not be pushed into an unsecured generic form just because it is easy to link from a QR code.
A trustworthy QR should not make the final destination mysterious, especially on posters, labels, menus, parking signs, or event materials.
A pasted QR can misdirect arrivals
Use branded pages, clear printed context, and staff-controlled placement so people know the check-in destination is legitimate.
Before paying, check the domain, HTTPS, amount, recipient, and whether the destination matches the place or brand that printed the QR.Review the check-in page before it goes into the lobby
Scan from the final sign, reminder, desk card, or intake packet and confirm that the page is fast, official, and specific to this appointment workflow.
The current detailed report is a static URL analysis. It helps reveal the encoded content and basic URL risk signals, but it does not guarantee that a destination is safe and does not replace browser, antivirus, payment, or bank security checks.Decoded content
See the raw value inside the QR before opening it.
Content type
Recognize URL, Wi-Fi, mailto, phone, SMS, vCard, or plain text.
URL risk signals
Review HTTPS, shorteners, IP addresses, long URLs, encoded characters, query parameters, and sensitive keywords.
Destination report
For URL codes, view final URL fields, static redirect report fields, domain fields, TLS placeholders, page metadata fields, and risk reasons.
Keep ownership clear when the appointment process changes
Someone should own the destination, form routing, staff notification, and printed QR placement. Otherwise an old lobby sign can keep sending arrivals into the wrong workflow.